
Ready to become a pilot in Canada? Here’s how.
- Flaps Full

- Dec 14, 2025
- 28 min read
Updated: Jan 7
From First Lesson to Licence: A complete guide to earning your Private Pilot License in Canada in 2026.
I strongly believe that one of the most rewarding (and most challenging) things a person can take on is earning their pilot’s licence. While the material covered during your first licence (the Private Pilot Licence, or PPL) isn’t overly difficult on its own, the sheer volume of information you’re expected to absorb presents a challenge all by itself. Many people (myself included) describe it as “drinking from a fire hose.”
For many new pilots, the hardest part isn’t a single concept, but the number of unknowns. Although the syllabus for earning your PPL is a highly structured and proven process, student pilots often find themselves buried in day-to-day learning. As a result, they don’t always have the time (or the energy) to look ahead and understand what comes next.
That gap is exactly why I created this guide. Its purpose is to outline the process of earning your PPL, roughly in chronological order, and to provide clarity on what you can expect along the way. While every flight school and instructor will approach training slightly differently, it’s almost certain that you’ll encounter all of the topics covered here, or at least have questions about them.
Ultimately, the goal of this guide is to present the path to earning your PPL in a clear and logical way, with the hope of reducing stress and uncertainty for new student pilots.
Navigate to Article Contents
Discovery Flight

The first step for anyone interested in becoming a pilot is a discovery flight. This is typically a 30-minute to one-hour flight with a certified flight instructor, during which you (the prospective student pilot) get hands-on time flying the aircraft. The flight is conducted one-on-one with the instructor, and if you decide to pursue flight training afterward, this time can be logged in your logbook.
The cost of a discovery flight varies between flight schools, but generally ranges from around $150 for a 30-minute flight to $350 for a one-hour flight. The one-hour option is often referred to as an “Advanced Discovery Flight” and usually includes a more comprehensive experience, such as a detailed walk-around (pre-flight inspection of the aircraft) and a ground briefing with the instructor before the flight.
Ultimately, you have very little to lose by taking a discovery flight. If you find yourself hooked (which is very common) that’s great: you’ve already logged flight time toward your licence. And if you discover that flying in a smaller aircraft isn’t for you (also not uncommon), it’s far better to learn that early before committing thousands of dollars to training.
To book a discovery flight, contact your local flight school/flying club.
Types of Permits and Licences and the Requirements
Although this guide focuses on the most common license (PPL), there are other alternatives, such as a Recreational Pilot Permit. There are also licences and permits for aircraft such as ultra-lights and gliders, but this guide focuses on aeroplanes.
Recreational Pilot Permit (RPP)
The holder of a Recreational Pilot Permit will have restrictions that Private Pilot Licence holders do not. This includes the ability to fly within Canada only, only able to fly aircraft with 4 seats or less, only able to carry one passenger at any time. The RPP can be a great starting point for aspiring aviators, allowing them to fly for pleasure or personal transport.
Requirements
Obtain and maintain a Category 4 Aviation medical (completed with a family doctor)
Obtain a minimum of 60% on the Transport Canada written exam (RPPAE)
Note: ground school is not required, but is strongly recommended
Complete a minimum of 25 hours of flight training, with a minimum of:
15 hours dual (with an instructor) including 2 hours cross-country
5 hours solo
Successfully complete the flight test
*Note: the hour requirements are the Transport Canada minimums. Nearly all pilots will exceed these minimums while training.
Privileges
Fly solo at age 14, however, you must be 16 to obtain this permit
Fly anywhere in Canada in day VFR with a maximum of one passenger
Upgrade to PPL if desired
Restrictions
Can only fly in VFR (visual flight rules) conditions during day
Can only fly single-engine aircraft with 4 seats or less, however, can only carry 1 passenger
Can only fly within Canada
Unable to add endorsements (such as night rating, multi-engine rating, etc.)
If your goal is to fly recreationally in day VFR conditions or to get started in aviation at a lower cost, the RPP may be a good fit. However, if you’re considering a career in aviation, want to fly at night, travel to the United States, carry more than one passenger, or have greater overall privileges, the RPP will likely be limiting, and a Private Pilot Licence (PPL) may be the better choice.
Private Pilot Licence (PPL)
The Private Pilot License is the most common licence, and often the starting point for many pilots. Most pilots enjoy the enhanced privileges the PPL offers compared to the RPP, and often "skip" over the RPP.
Requirements
Obtain and maintain a Category 3 Aviation medical (completed with a Civil Aviation Medical Examiner)
Complete 40 hours of ground school instruction (click here to view our article detailing online ground schools)
Obtain a minimum of 60% on the Transport Canada written exam (PPAER)
Complete a minimum of 45 hours of flight training, with a minimum of:
17 hours dual (with an instructor) including 3 hours cross-county and 5 hours of instrument time
12 hours solo including 5 hours cross-country
Complete a cross-country flight of at least 150 nautical miles with 2 full stop landings at other airports
Successfully complete the flight test
*Note: the hour requirements are the Transport Canada minimums. Nearly all pilots will exceed these minimums while training. The average completion of a PPL is roughly 60-70 total hours.
Privileges
Fly solo at age 14, however, you must be 17 to obtain this license
Carry multiple passengers
Fly worldwide (Canada, US, and beyond)
Fly any aeroplane that you hold the appropriate rating for
Add ratings and endorsements (night, instrument, multi-engine, etc.)
Restrictions
Can only fly in VFR (visual flight rules) conditions during day, unless you obtain additional ratings
Can only fly single-engine aircraft, unless you obtain additional ratings
Cannot fly for hire (cannot work as a pilot)
If you are considering a career in aviation or think you may want to add additional ratings to your licence in the future, the Private Pilot Licence (PPL) is likely the right choice for you.
The Cost of Flight Training
It’s no secret that flight training is expensive. Current statistics suggest that nearly 80% of people who start flight training do not complete it, with cost cited as the number one reason. Many flight schools advertise the cost of obtaining your PPL based on Transport Canada minimums, which typically fall in the $14,000–$16,000 range depending on the aircraft used. In reality, however, the true cost of earning a PPL is often closer to $20,000–$25,000. Below is a sample cost breakdown based on training in a Cessna 172 (the most common training aircraft) for a typical student in a self-paced program with an estimated total time to completion of around 65 flight hours. All figures include HST.
Description | Quantity | Price |
|---|---|---|
Dual flight hours | 40 @ $325.16 | $13,006.40 |
Solo flight hours | 25 @ 240.41 | $6,010.25 |
Ground School | $300.00 | $300.00 |
Ground School Supplies | 400.00 | $400.00 |
Aviation Medical | $250.00 | $250.00 |
Flight Test Fee | $500.00 | $500.00 |
Flight Test Aircraft | 1.5 @ 240.41 | $360.62 |
ANR Headset (not required, but strongly recommended. Price will vary by model) | $1400.00 | $1400.00 |
Written Exam | $105.00 | $105.00 |
Misc Equipment or Supplies | $300.00 | $300.00 |
Misc Fees (Club Membership, License Fee, etc.) | $300.00 | $300.00 |
Total Average Cost | $22,931.97 |
The total cost of flight training will vary from person to person due to a wide range of factors. There is a significant financial barrier to entry when it comes to becoming a pilot, and the costs only increase as you progress through additional licences and ratings. For those pursuing aviation as a career, the total cost of training can easily exceed $100,000. While the investment is substantial, for those who are truly passionate about aviation, the time, energy, and money put into training can pay off in the long run.
Unfortunately, in Canada, government education loans (such as OSAP) are generally not available for standalone flight training. One notable exception is for students completing their training as part of a university or college degree or diploma program. In these cases, you may be eligible for government funding to cover tuition, but the cost of flight training itself is often excluded.
While many financial institutions do offer loans for flight training, they typically come with higher interest rates. There is no single “correct” or “best” way to finance your training, but I generally recommend saving before you start and working while completing your training, if possible. Although this approach may take longer, finishing with less debt can make a meaningful difference and remove a significant burden as you progress in your aviation career.
Selecting your Flight School
Much like choosing a university or college, selecting the right flight school is one of the most important decisions you’ll make during your training. The school you choose can have a significant impact on your overall experience, training timeline, and long-term success in aviation.
There are several key factors to consider when evaluating flight schools, including:
Location – Proximity matters. A school closer to home or work can make it easier to train consistently, which is critical for progress and cost control.
Price – While lower hourly rates can be appealing, they don’t always tell the full story. Be sure to understand what’s included in the pricing and whether there are additional fees.
Fleet – A well-maintained, appropriately sized fleet helps ensure aircraft availability and minimizes training delays. Consider the type of aircraft used and how many are available for students.
Your goals – Your choice of school should align with your objectives. Some schools cater primarily to hobbyists, while others are better suited for those pursuing an aviation career.
Reputation – Talk to current and former students, read reviews, and research the school’s track record. A strong reputation often reflects consistent instruction and good operational practices. Best practice, join Facebook groups for Canadian student pilots. More likely than not, there will be current student(s) that can provide insights to a specific school.
Aircraft and instructor availability – Limited instructor availability or frequent aircraft downtime can significantly slow your training and increase costs.
Private Career College (PCC) Status - Some flight schools in Canada are registered as Private Career Colleges. This designation provides an added layer of protection for students, including safeguards around prepaid tuition and clearer regulatory oversight. If a PCC-registered school were to close unexpectedly, students may be eligible for tuition protection or reimbursement through provincial mechanisms.
Another key decision you’ll need to make is how you complete your training, whether through a modular, self-paced approach; an aviation bachelor’s degree program; an aviation diploma program; or by joining an integrated ATPL (iATPL) or airline cadet program.
Self-Paced Modular Approach

The modular approach to flight training allows you to complete your training at your own pace. This has been the traditional pathway to becoming a pilot for decades and offers the greatest level of flexibility. With this approach, you can choose to stop after earning a
Private Pilot Licence (PPL) or continue on to additional licences and ratings.
For students pursuing a professional pilot career, the typical modular progression includes:
Private Pilot Licence
Night Rating
Commercial Pilot Licence (CPL)
Multi-Engine Rating
Instrument Rating
Group 1: Multi-Engine
Group 3: Single-Engine
Optional: Flight Instructor Rating
Many pilots go on to earn their flight instructor rating as a way to build flight hours while getting paid (often as their first job as a pilot). Others choose to build experience by working for small aviation companies by performing aerial work or flying charter operations.
The modular approach is often the most cost-effective way to earn your licences, but it usually takes longer to complete than more structured programs. One of its biggest advantages is flexibility, allowing students to work part-time or full-time while training.
Training is generally conducted on a pay-as-you-go basis, giving you control over both the pace and timing of your progress. You can typically start at any time, unlike more structured programs that operate on fixed class start dates.
Bachelor Degree

Complete your flight training and earn a 4-year bachelors degree at the same time. While these programs may vary, generally you will earn a Bachelors Degree while earning your licences and ratings, including PPL, CPL, Group 1 Instrument Rating, VFR Over-the-Top, and Night Rating.
While these programs are a valuable way to earn a bachelor degree and complete flight training at the same time, they come with a high price tag, often upwards of $120,000.
Examples of schools in Ontario who offer aviation bachelors programs include:
University of Windsor: Commercial Aviation Leadership
Seneca College: Bachelor of Aviation Technology
University of Waterloo: Science and Aviation
Western University: Commercial Aviation Management
College Diploma

College diploma programs allow you to complete your flight training while earning a college diploma. Generally, these programs are 2-3 years in length. Each program will vary, but generally you will earn your PPL, CPL, and Night Rating.
Examples of colleges in Ontario include:
Confederation College: Aviation -Flight Management (Ontario College Advanced Diploma)
Conestoga College - Commercial Flight Operations (Ontario College Diploma)
Sault College: Aviation Technology - Flight (Ontario College Advanced Diploma)
Integrated Airline Transport Pilot (iATPL)
An Airline Transport Pilot Licence (ATPL) is the highest level of pilot licence available. Commercial airlines require pilots to hold an ATPL in order to act as a captain, making it the ultimate goal for the vast majority of professional pilots.
Integrated ATPL (iATPL) programs are designed to take students with little to no flight experience and prepare them for airline operations through an accelerated training pathway, typically completed in under two years. These programs are highly structured and intensive, allowing students to complete ground school and flight training concurrently. The advantage of an iATPL program is students are able to write their ATPL exams with less than 200 hours, compared to the typical requirements of 750 hours. This enables iATPL graduates to gain direct entry into the airlines.
Most iATPL programs will cost around $100,000 to upwards of $135,000.
Most iATPL programs are designed so that successful graduates leave with the following qualifications:
A Private Pilot Licence
A Night Rating
A Commercial Pilot Licence
A Multi-Engine Class Rating
A Group 1 Instrument Rating
A “Frozen” Airline Transport Pilot Licence (ATPL)
The ATPL is based on a combination of written examinations and minimum flight-hour requirements. In iATPL programs, students are typically eligible to write the Transport Canada ATPL exams before graduation. Once completed, these exam results remain valid (or “frozen”) for a period of up to five years. This allows graduates time to build the required flight experience and meet all remaining Transport Canada requirements under the Canadian Aviation Regulations and Standards in order to obtain a full (unfrozen) ATPL.
Flight schools in Ontario that offer iATPL include:
Genesis Flight College
Brampton Flight Centre
Centennial College
Western University
Cadet Program
A cadet program is an iATPL course with the added benefit of an interview with the airline prior to completing the course. If successful, the student will receive a conditional offer of employment from the airline to be hired as a first officer upon graduation. This type of pilot training program is offered by a flight training college in partnership with an airline.
A typical cadet program will cost upwards of $150,000.
Airlines in Canada that offer cadet programs include:
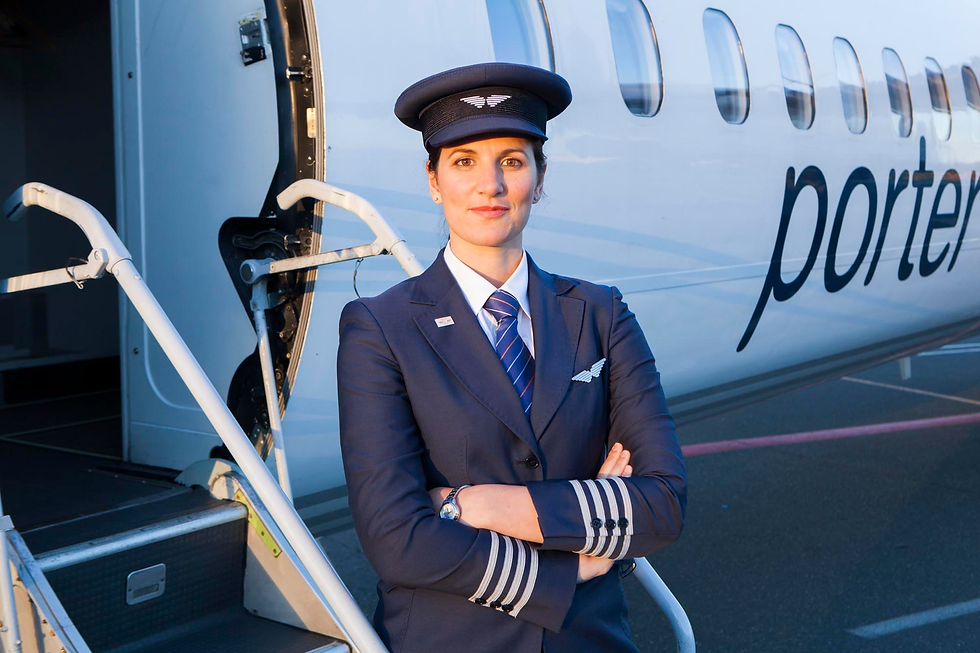
Porter Airlines: Destination Porter (train at Cygnet Aviation Academy, Kingston ON)
Air Canada Jazz: Jazz Approach (train at Cygnet Aviation Academy, Kingston ON)
Flair Airlines: Flair Cadet Program (train at Genesis Flight College, Collingwood ON)
Air Transat: Ascension Academy (train at CAE Phoenix Aviation Academy in Phoenix, AZ)
Selecting a Ground School

While most flight schools offer in person ground school for PPL candidates, that may not be the best option for you. Other alternatives include online ground school, which is very popular among student pilots.
Click here to read our Essential Resources article that covers Apps & Websites, including three popular online ground schools.
An important detail to consider: not all online ground schools will meet the requirements to write your written exam. Unless you are writing the RPP Written Exam, you will need to earn a recommendation letter to write the written exam. Ensure your ground school of choice can provide this for you. Alternatively, your flight instructor can provide this recommendation to you, provided you can prove to them that you have completed the minimum ground school requirements.
Aviation Medical

Now that you’ve completed a discovery flight, understand what type of program/training you want to complete, put together a plan to finance your training, and selected a flight school, it’s time to obtain your aviation medical. You will want to complete this step as soon as possible, often even before choosing a school. However, I recommend waiting until after a discovery flight. If you find that you don’t enjoy spending time in a small aircraft, you’ll avoid wasting money on a medical you don’t end up needing.
Aviation medicals are notorious for taking months (and in some cases, years) to be approved, assuming you meet all the requirements. There have been many instances where students begin training, spend thousands of dollars, and only later discover that their medical has been denied. Even if you are in excellent health, it is not uncommon for Transport Canada to take three months or more to process a medical application. A valid medical is required before a Student Pilot Permit can be issued (more on this later), which in turn is required before you can fly solo. The takeaway is simple: get your medical before progressing too far into your training. To be clear, you do not need a medical to start flying with an instructor. You can choose to start training (if permitted by the school) prior to obtaining your medical.
In Canada, there are four classes of aviation medicals. Category 1, 2, and 3 medicals must be completed by a Civil Aviation Medical Examiner (CAME), a physician specially designated by Transport Canada to conduct aviation medical examinations. A Category 4 medical can be completed with your family doctor.
Category 1: required for CPL and ATPL
Category 2: for Air Traffic Controllers
Category 3: for PPL
Category 4: for RPP
A pilot who holds a Category 1 medical is considered medically fit to exercise the privileges of any permit or licence for the duration of its validity. This means a Category 1 medical satisfies the medical requirements for licences such as the PPL or RPP. If a pilot holds a Category 1 medical and allows it exceed the Category 1 validity period, it automatically reverts to a Category 3 medical, skipping Category 2, which is reserved for air traffic controllers.
For anyone considering earning a Commercial Pilot Licence (CPL), I recommend applying for a Category 1 medical as your initial medical (even before earning your Student Pilot Permit). Since a Category 1 medical is considered valid for any permit or licence, you can use it, within the validity period of a Category 3 or 4, while completing your PPL. If you do not meet the requirements for a Category 1 medical, it’s far better to discover that early rather than after investing thousands of dollars into training.
Aviation medicals are not valid indefinitely. In general, the higher the medical category and the older the pilot, the shorter the validity period.

Your First Lesson
The day has finally arrived. You’ve chosen a flight school and training path that’s right for you, completed your medical examination (even if the approval hasn’t arrived yet), and you’re ready to begin flight training. While each flight school structures its syllabus slightly differently, all schools ultimately teach the same core skills and knowledge required by Transport Canada.
Your first flight lesson (often referred to Lesson Plan 1 or LP1) is designed to introduce you to the aircraft and the fundamentals of flight. While the exact sequence may vary, your first lesson will typically include:
Learning how to perform a walk-around, also known as a pre-flight inspection, to ensure the aircraft is safe to fly
An introduction to normal procedures, including starting the aircraft and completing pre-flight checks
A demonstration of taxiing, or “driving” the aircraft on the ground
A demonstration of takeoff
Practicing straight and level flight
Learning the basic control inputs used to fly the aircraft
A demonstration of landing (your instructor will handle most, if not all, of this)
It’s important to set realistic expectations: your first lesson will feel overwhelming, and that’s completely normal. Your instructor will introduce concepts you may have only read about, or perhaps never encountered at all. Many students expect perfection after only a few attempts, but flight training doesn’t work that way.
Some manoeuvres will come naturally, while others may take many hours to refine. And even once you feel you’ve mastered a skill, there will still be days when mistakes happen. That’s a normal part of learning to fly, and a normal part of life.
Congratulations on completing your first lesson! You are one step closer to becoming a pilot!
Maximizing the Value of Your Lessons
Flight training is a significant investment of time and money, so it’s worth approaching each lesson with the goal of getting as much value out of it as possible. Below are a few practical ways to make your training more efficient and productive:
Come Prepared - Show up to each lesson having already reviewed what you’ll be working on (your school will likely provide you with a syllabus). If you understand the procedure being taught (for example, the steps involved when climbing and descending) and have a high-level grasp of the theory behind it, your instructor can spend more time refining your technique rather than introducing an entirely new concept. Even a short review beforehand can dramatically improve how much you get out of a flight.
Do a Thorough Debrief - After every lesson, your instructor will conduct a debrief. Treat this as one of the most valuable parts of your training. Take notes and create a simple action plan: What went well? What needs improvement? What should you focus on before the next lesson? This turns each flight into a clear learning roadmap and gives you specific items to work on between lessons.

A free Lesson Planner is available in our shop (click here). This is the same document I used for every training flight, both with an instructor and while flying solo, to ensure I was fully prepared. Some of the concepts on this document will be introduced as you continued your training (Ex, performance calculations and NOTAMs). Don't stress if items on this planner are unknown to you or seem intimidating.
This planner is designed to help you approach each lesson with purpose and consistency, and it includes the following sections:
Ground Brief: Review the weather and operational environment before each flight. This includes decoding a METAR or TAF to understand current or expected conditions, identifying the likely runway in use, and calculating the wind component. You should also review all relevant NOTAMs and consider whether any may impact your flight.
Calculations: Complete performance and planning calculations before every flight. Even if they aren’t strictly required for that lesson, regularly practicing these calculations builds proficiency and confidence, especially when you begin planning cross-country flights and preparing for your flight test.
IMSAFE: complete the IMSAFE checklist. IMSAFE is used as a “self-check” to make sure that you, the pilot, are as ready to fly as the aircraft is.
I – Illness
M – Medication
S – Stress
A – Alcohol
F – Fatigue
E – Emotion
Exercises During this Flight: List the exercises you plan to work on during the lesson. Where applicable, include key procedures such as the entry, execution, and recovery for each manoeuvre.
De-Brief: After the flight, record feedback from your instructor and reflect on your own performance. Use this information to identify strengths, areas for improvement, and trends over time. Even on solo flights, you should always conduct a brief and de-brief, self-evaluation is a critical pilot skill. A well-prepared pilot is a safer pilot.
Action Items: Based on your de-brief and plans for the next lesson, create a clear list of action items to review, study, or practice. This ensures continuous improvement and keeps each lesson connected to the next.
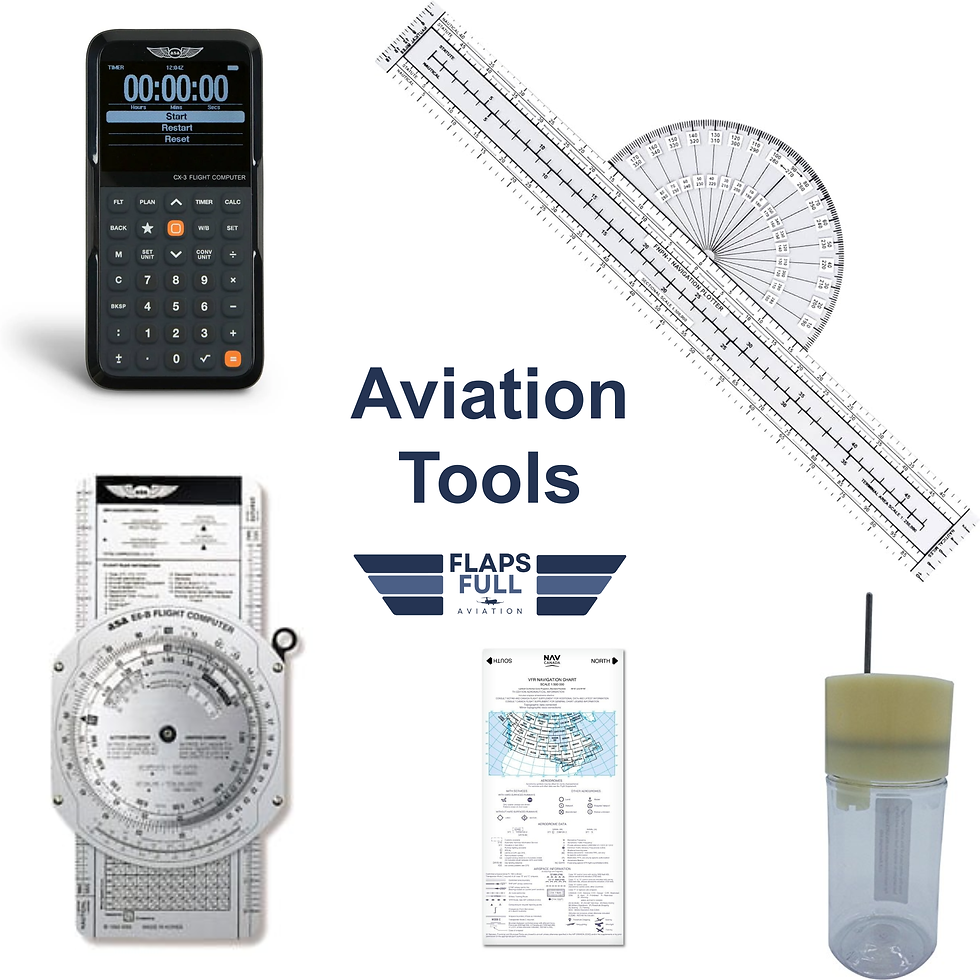
Essential Supplies
One of my favourite (and least favourite) parts of flight training was building my “toolkit,” better known as my flight bag. It’s exciting to assemble the essential gear that supports your training, but you’ll quickly learn why this is also a least favourite: almost everything in aviation comes with a significant price tag.
When I first started my PPL training, I knew I wanted a good ANR headset (half an hour with passive David Clarks on a discovery flight was more than enough to convince me), but beyond that, I had no idea what else I truly needed. That uncertainty is exactly why I created the Essential Resources page on FlapsFull.
This page features a curated list of tools and resources that support your training from day one through your flight test. Items marked with ✈️ are either strongly recommended, or, in some cases, mandatory (depending on your stage of training.)
PSTAR Exam
The PSTAR (Pre-Solo Test of Air Regulations) is a written examination that student pilots must pass before being issued a Student Pilot Permit. This is the first of three written exams you will write.
The PSTAR consists of 50 questions drawn from the official Transport Canada study guide. The passing mark is 90%, and any incorrect questions are reviewed with your instructor until the exam is corrected to 100%. Your flight instructor will take care of scheduling the PSTAR. Unlike the PPAER (the main written exam), the PSTAR is less formal. Most flight school administer the PSTAR themselves.
The PSTAR questions are not secret (quite the opposite). The entire question bank, consisting of 200 questions, is published in the official Transport Canada guide (linked above). That said, simply passing the exam isn’t the objective. The purpose of the PSTAR is to ensure you understand the essential rules and knowledge required to fly safely on your own. This includes topics such as right-of-way rules, visual signals, radio communications, airport markings and signage, pilot responsibilities, wake turbulence, and more.

To prepare for the PSTAR, I recommend using the PSTAR Plus - Transport Canada app. It presents all PSTAR questions in a flashcard-style format, which makes the material easier to review, understand, and retain.
In the interest of flight safety, it’s important to spend extra time reviewing any weak areas. This knowledge forms the foundation of safe solo flight, and mastering it makes you a safer pilot, for both yourself and everyone else in the airspace.
Radio Operators Exam (ROC-A)
If you plan to fly an aircraft in Canada, you are required to hold a Restricted Operator Certificate – Aeronautical (ROC-A). This certificate is issued under Industry Canada regulations and is mandatory for anyone who transmits on aircraft radio frequencies. Your instructor will likely schedule this exam on your behalf. Most flight schools will conduct the ROC-A exam in-house.
Unlike the PSTAR, there is no published question bank for the ROC-A exam. However, thoroughly reviewing the official study guide will set you up for success. A best practice is to complete an online preparation course, most online ground schools include ROC-A prep as part of their PPL ground school curriculum. This helps ensure you understand the material and are well prepared for both the written and practical components of the exam. I personally used the PilotTraining.ca ground school course and completed the exam with no difficulties.
The ROC-A requires a 70% pass rate and consists of a multiple choice exam of 25 questions.
Student Pilot Permit
Issuance of a Student Pilot Permit (SPP) is required for you to fly solo. The SPP certifies that you are properly qualified to exercise the privileges of a Student Pilot in a certain category of aircraft. In our case, this is an Aeroplane.
The Student Pilot Permit allows you to:
Act as PIC of an aircraft that you are endorsed, provided:
The flight is conducted for the purpose of your flight training;
The flight is conducted in Canada;
The flight is conducted under Day VFR;
The flight is conducted under the direction and supervision of a person qualified to provide training (this is your CFI authorizing your flight);
No passenger is carried on board
To obtain a Student Pilot Permit, you must:
Pass the PSTAR
Pass the ROC-A exam
Speak, understand, read and write in English (this is assessed when you write your ROC-A exam)
Hold a valid medical (minimum class 4)
When flying solo, you must have your SPP, medical, and restricted operation radio certificate with you.
First Solo
Your first solo is a moment you’ll remember for the rest of your life. The experience of flying an aircraft by yourself for the first time is something only pilots truly understand.
I strongly recommend having something hands free (Go Pro, Ray Ban Meta glasses, etc.) to record. This is a moment you won't want to forget.
A quick heads-up: following your first solo, it’s a long-standing tradition for your instructor to douse you with water. If you’re getting close to this milestone, it’s a good idea to keep a change of clothes in your car. Some instructors will tell students in advance that their first solo is coming, while others will simply jump out of the aircraft (on the ground, of course) and send you on your way.
Private Pilot Aeroplane Exam (PPAER)
The PPAER is the third written exam needed to earn a PPL. This is the main, and hardest exam, that ground school prepares your for. To pass the PPAER, you must obtain an minimum of 60% on the exam and in each section. If you obtain an overall grade above 60%, but fail to achieve 60% in a section, you will have to re-write that section. The exam consist of 100 multiple choice questions and is 3 hours in length, consisting of four subject areas:
Air Law
Navigation
Meteorology
Aeronautics - General Knowledge
To write the PPAER, you must meet the following prerequisites:
Medical Fitness - you must have a valid medical from the appropriate category.
Identification - you must provide a valid ID that is an official document bearing your signature and photograph.
Recommendation - you must provide a letter of recommendation dated within 60 days of the date of your exam.
Experience - minimum 5 hours flight time.
You can write your exam at a Transport Canada testing centre, or, in some cases, at your flight training unit (FTU). Certain FTUs are authorized to administer the PPAER, allowing you to write the exam directly at your school. If your FTU is approved, this can be a convenient option. Regardless of where you write the exam, your results will be available immediately upon completion and will be provided by the exam invigilator.
Preparing for written exams can feel like a monstrous task. Check out our article detailing practical tips to help you succeed (coming soon!).
Solo Practice Flights
Once you’ve accomplished your first solo, you’ll begin flying solo more frequently. In my opinion, this is one of the most rewarding parts of PPL training. When you are prepared and confident, flying by yourself is a surreal feeling.
A typical lesson during this phase involves flying with your instructor to review specific exercises, followed by completing the same lesson on your own (generally on a different day). This structure helps build confidence and independence, and it closely mirrors the flight test environment, where the examiner will be present but largely silent, simply observing your performance.
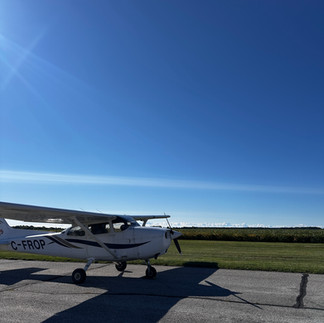
Below are a few photos I captured during this stage of my training. The photo on the left was taken on my first solo flight to the practice area. Although the clouds were only scattered and cirrus, it appeared as though I was flying into IMC conditions. In reality, visibility was still well on the safe side of VMC, but was reduced due to smoke from wildfires burning in Northern Ontario.


Cross Country
While I’ve mentioned a few aspects of flight training as being my favourites, the cross-country phase was truly the highlight for me.
As part of the PPL requirements, you must complete a cross-country flight of at least 150 nautical miles, including two full-stop landings at airports other than your point of departure. You are responsible for planning the entire flight, including route selection, performance calculations, and a thorough weather briefing. Typically, you’ll fly the route first with your instructor, and then shortly afterward, repeat the flight solo.
On your solo cross-country, you’ll usually stop at a local flying club or FBO to have your logbook stamped. This serves as proof that you completed the required flight.
My cross-country route was Windsor – St. Thomas – Sarnia – Windsor. The flight with my instructor was an added challenge, as the winds were gusting 30, with a low-level-jet passing north of us. Definitely not ideal conditions for a solo student, however, a great test of my skills flying with my instructor.
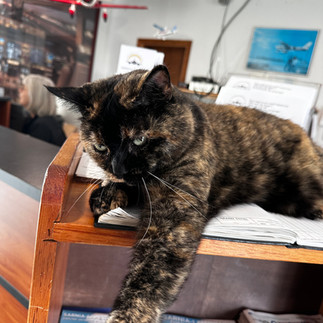
As a bonus, if you ever find yourself flying into Sarnia, be sure to stop by Huron Flight Services. They’re known for having the friendliest cat and dog (pictured below) to greet visiting pilots, and they even keep a logbook for cross-country pilots to sign to document their visit.


Flight Test Prep
Once you’ve completed your cross-country flight, you’re essentially finished with the PPL training syllabus. The final step is preparing for, and completing your PPL flight test.
Click the links below to access our articles providing an overview and lessons learned from completing the PPL Flight Test.
By this stage, many of your recent flights will likely have focused on circuit work and cross-country flying. Flight test preparation typically shifts your attention back to air work, including manoeuvres such as steep turns, stalls, slow flight, and other core exercises required for the test. Your instructor will consistently reference two materials:
The PPL Flight Test Guide (know and understand this)
The Flight Test Report (marking sheet)
It’s completely normal at this stage to feel a bit rusty with your air work. I still remember the first time I attempted slow flight during flight test preparation. I struggled to establish the manoeuvre and consistently lost altitude, especially in turns. A quick review of the Flight Training Guide and a solo practice flight were all it took to get things back on track. The takeaway is simple: it's okay to struggle, and with focused practice, it’s easily fixed.
After some focused practice, both with your instructor and solo, your instructor will schedule a mock flight test. This practice test includes both the ground portion and the flight portion, and your instructor will treat it as if it were the real thing. The goal is twofold: to prepare you mentally for the test environment and to objectively assess your readiness.
Following your first mock flight test, it’s normal to have several areas identified for improvement. You’ll typically spend time practicing these items, often solo, before completing another mock flight test with your instructor. This cycle may repeat more than once, depending on your progress.
Once your instructor consistently grades you as a 3 or 4 on all required manoeuvres (based on the Transport Canada flight test guide), they will likely recommend you for your official flight test. At that point, your instructor will book the flight test with a Transport Canada–approved examiner.
Remember, your instructor will never recommend you for a flight test unless they are confident you can pass. Your performance on the flight test directly reflects on them as an instructor, and they have a vested interest in ensuring you are fully prepared. If your instructor says you’re ready, it’s because they genuinely believe you have the knowledge, skill, and judgment required to succeed.
The Flight Test
After hours of studying and flying, you’ve finally reached it: your PPL flight test. For most students, this will be one of the most stressful tests they ever take, not because it’s exceptionally difficult, but because the process is entirely new. You’ve never done a flight test before, and the unfamiliarity alone can add pressure.
Flight Test Admission Requirements
To be admitted to the PPL flight test, you must present the following:
Government-issued photo ID with a signature
A valid aviation medical (minimum Category 3)
A letter of recommendation from your instructor, signed within 30 days of the flight test
Proof of at least 35 hours of flight time(Note: it is extremely rare for a candidate to attempt, let alone pass a PPL flight test with only 35 hours)
Flight Test Scoring
Each flight test item is scored on a four-point scale:
Mark of 4: performance is well executed considering existing conditions. The candidate stayed well within the flight test standards.
Mark of 3: performance is observed to include minor errors. The candidates performance included minor deviations from the qualification standards, but was within prescribed limits.
Mark of 2: performance includes major errors. The candidates performance included major deviations from the qualifications standards which may include an excursions beyond prescribed limits.
Mark of 1: performance is observed to include critical errors, or the objective of the test item was not achieved. The candidates performance included an unacceptable deviation from the qualification standards.
Pass/Fail Criteria
To pass the flight test, a candidate must achieve a minimum score of 62 out of 124 (50%). While this may sound low, the actual pass criteria are more nuanced:
An overall score below 62 results in a full re-test.
Failure of any ground portion results in a full re-test, and the air portion will not be conducted.
One or two air items graded as a “1” require a partial re-test, covering only the failed items.
Three or more air items graded as a “1” require a full re-test.
More than five combined items graded as “1” and/or “2” constitutes a full failure, requiring a complete re-test.
If a candidate receives a Mark of 1 on one or two air items, a partial re-test is permitted provided:
The overall pass mark was achieved
There are no more than two failed air items
There are no more than five combined “1” and/or “2” grades
Before attempting a partial re-test, the candidate must receive additional training from their instructor on the failed items. The partial re-test must be completed within 30 days. If the partial re-test is unsuccessful, a full re-test will be required.
Flight Test Structure

The PPL flight test is divided into two sections: Ground and Air.
Ground
The ground section consist of exercise 2A, 2B, 2C, and 23A.
2A: Documents and Airworthiness
2B: Aeroplane Performance
2C: Weight and Balance
23A: Pre-Flight Planning Procedures (Navigation)
I strongly suggest you purchase the book, Flight Test Notes, which provides a comprehensive overview of these exercises along with typical questions examiners commonly ask.
Air Items
The remainder of the flight test consists of air exercises. A common mistake students make is assuming that air items only involve manoeuvres performed in flight. In reality, air items also include:
The pre-flight inspection (walk-around)
Engine start and run-up
Operation of aircraft systems
Taxiing procedures
Flight Test Notes also provides a complete and detailed review of all air items and is, again, highly recommended.
You will know the outcome of your flight test immediately, whether you’ve passed, received a partial fail, or received a complete failure. Regardless of the result, the examiner will conduct a debrief with you and your instructor to review your performance.
Applying for your License

Congratulations! You passed your flight test! If you’ve completed all the required prerequisites, you can now apply for your Private Pilot Licence. Your flight school will handle most of the paperwork on your behalf; however, when doing so, I recommend using the Transport Canada TC Air app, as this method is generally much faster than the traditional process.
While you wait to receive your Aviation Document Booklet (ADB), your flight school can endorse your Student Pilot Permit, allowing you to exercise the privileges of a PPL in the interim.
And that’s it. Congratulations. You’re officially a pilot! Next step: decide who your first passenger will be.
Habits that Set you up for Success
Chances are, if you’ve made it to the end of this article, you’re either a prospective student or a student pilot currently working toward your PPL.
For those actively in training, here’s a short list of tips and habits I picked up along the way that can make your training smoother, safer, and less stressful:
Calculate aircraft performance before every flight. Performance calculations are required for cross-country planning and on your flight test. Building this habit early will make these tasks feel routine rather than overwhelming later on.
Use downtime at the airport productively. There will be days when you arrive for a lesson and the aircraft isn’t ready. Take advantage of that time to read and memorize emergency procedures. You’ll need them memorized for your flight test, and more importantly, they can save your life in a real emergency.
Review the weather every day, even when you’re not flying. Regularly analyzing weather products such as METARs, TAFs, and GFAs will dramatically improve your ability to interpret the data and make sound decisions. Weather knowledge is a key flight test requirement and one of the most important safety skills you’ll develop as a pilot.
Study to learn and understand, not to pass the test. Many of the concepts you’ll study aren’t there simply to satisfy exam requirements. They directly impact decision-making, safety, and confidence in the cockpit. A deep understanding will serve you far better than short-term memorization.
Take photos along the way. Flight training is an incredibly fun and memorable chapter of your life. Capturing these moments allows you to look back years later and truly appreciate how far you’ve come. Just be sure to do so safely and without distracting from flight operations.
Why It’s All Worth It

Becoming a pilot is, and likely always will be, one of the best decisions I’ve ever made. Aviation is a craft that demands skill, commitment, and a willingness to admit you don’t know everything and to learn from those who know more. Along the way, you will face setbacks and moments of self-doubt, and how you choose to respond to them will ultimately shape the pilot and person you become. Remember, one day, you’ll look back and wonder why you were ever worried.
Wishing you blue skies and tailwinds.✈️


Comments